Reusable Items
Many items and assets within Marigold Engage+ are designed to be reusable, so that you can create them once, then assign them to multiple Campaigns. Creating reusable items improves the efficiency and consistency of your Campaign strategy.
Content-related Items
Before creating a Campaign, create and save the items that will be added to the creative content.
Create a content block
Content Blocks are "containers" of HTML code and / or images that can be reused across Campaigns.
Note: For Content Blocks in the Email channel, the platform uses the enhanced HTML Content Editor, which provides a cleaner, more streamlined user interface, and code formatting enhancements. You can also optionally use the Content Designer feature to build the Content Block.
1. In the Top Navigation bar, select Assets > Blocks > Content Blocks.
2. On the Tool Ribbon, click New Content Block.
3. Fill out the Content block details:
- What? — Enter Content Block.
- Where? — Select the folder where you want to save the Content Block.
- Name — Enter a unique descriptive name for the Content Block.
- Source — Ensure Engage+ is selected.
- Data Source — Select the source table for the Content Block.
- Channel — Select the desired channel.
4. Click Create.
5. Provide the content for this Content Block:
- If you have the Content Designer feature enabled in your account, the Content Designer is displayed. Please see the Content Designer Quick Start Guide for more details.
- If you don't have the Content Designer feature enabled in your account, the enhanced Content Editor is displayed. Enter the HTML code into the Content Editor.
6. In the Tool Ribbon, click Save.
Create an opt-out message
An Opt-Out Message is a special type of Content Block, used to provide unsubscribe language and links, so recipients can opt out of future Campaigns.
Important: All Email Campaigns MUST have an Opt-Out Message within the content in order to launch the Campaign.
1. In the Top Navigation bar, select Assets > Blocks > Opt-Out Message.
2. To the right of the search by name field, click the New button.
3. Fill out the Opt-out Message details:
- Name: Enter a unique descriptive name for the Opt-Out Message.
- Source: Ensure Engage+ is selected
- Data Source: Select the source table for the Opt-Out Message.
4. Click Create.
5. Enter the Opt-Out Message HTML code into the Content Editor.
6. In the Tool Ribbon, click Save.
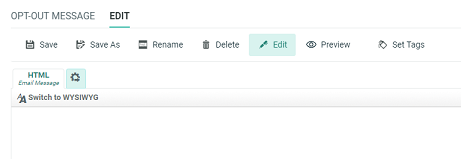
7. To create a Plain Text version of the Opt-Out Message, click the cog icon button next to the HTML tab. A list of format versions is displayed.
8. Click the check mark next to Plain Text. A "Plain Text" tab is created.
9. Enter the Opt-Out Message Plain Text content into the Content Editor.
10. In the Tool Ribbon, click Save.
Note: For transactional Campaigns (such as order confirmations, for example), you still must have an Opt-Out Message in the Campaign content, but the Opt-Out Message item can simply be blank. Follow the same steps, without entering any content, to create a blank Opt-Out Message.
Assign a content-related item to a campaign
Once you've created the content-related item, you can insert it into the content of a Campaign.
1. Navigate to the campaign.
2. Click the Content tab.
3. Open the Personalization and Library pane on the right.
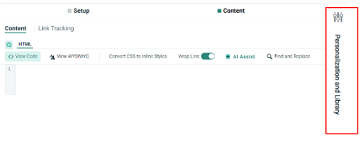
Once open, the view is as follows:
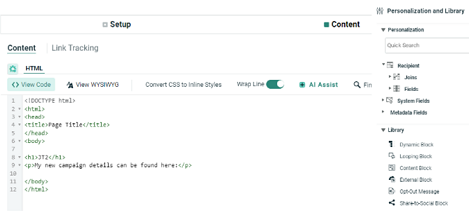
4. Expand the Library section.
5. Add the item using one of these two methods:
- Drag-and-drop the item type from the Personalization Panel into the desired position in the content area.
- Position the insertion point in the content, and double-click on the item type.
6. In the pop-up window, browse to and select the desired item.
7. The system inserts a Merge Symbol into the content at the indicated position.
8. Click Save.
Reply handlers
In some cases, recipients of an email message may attempt to respond to that message. In this situation, the platform can be configured to handle that reply by:
- Sending an automated reply message back to the recipient.
- Forwarding the recipient's reply message to a designated individual or group.
Create an auto-reply handler
Use an Auto-Reply Handler to send an automatic response to recipients who reply to a Campaign.
1. Select Settings > Campaign Settings > Auto-Reply Handler.
2. To the right of the search by name field, click the New button.
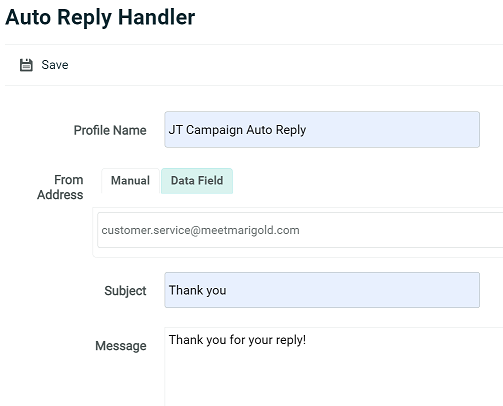
3. Enter a unique descriptive name for the Auto-Reply Handler.
4. Select from whom the Auto-Reply message will be sent:
- Click the Manual tab, then enter an email address.
- Click the Data Field tab, then select an "email" field.
5. Enter the subject line for the automated reply.
6. Enter the message content for the automated reply.
Note: Auto-reply messages must be Plain Text only; auto replies do not support the use of Dynamic Content or Personalization.
7. Click Save.
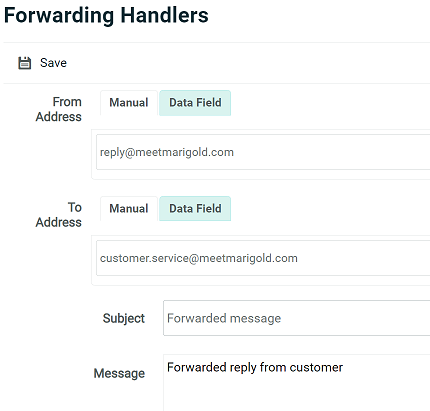
Create a forwarding handler
Use a Forwarding Handler to automatically forward a response from a recipient to a specified email address, such as to a customer service team.
1. Select Settings > Campaign Settings > Forwarding Handlers.
2. To the right of the search by name field, click the New button.
3. Enter a unique descriptive name for the Forwarding Handler.
4. Select from whom the forwarded message will be sent:
- Click the Manual tab, then enter an email address.
- Click the Data Field tab, then select an "email" field.
5. Select to whom the forwarded message should be sent:
- Click the Manual tab, then enter an email address.
- Click the Data Field tab, then select an "email" field.
6. Enter the subject line for the forwarded message.
7. Enter the content for the forwarded message. This content will appear in the forwarded email, along with the original reply from the Campaign recipient.
Important: Forwarded messages must be Plain Text only; forwarded messages do not support the use of Dynamic Content or Personalization.
8. Click Save.
6Assign a reply handler to a campaign
1. Navigate to the Campaign.
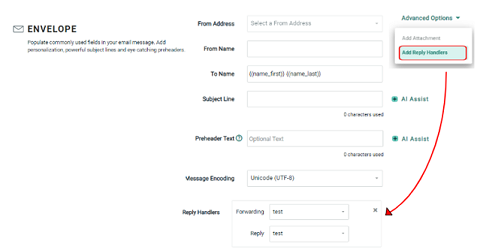
2. Click the Setup tab.
3. Within the Envelope section, from the Advanced Options drop-down menu, select Add Reply Handlers. This will add the Reply Handlers fields, Select a Forward Profile and Select a Reply Profile.
4. Within the Reply Handling section, select a Forwarding Handler and / or an Auto-Reply Handler.
5. Click Save.
Audience-related Items
A Campaign's main audience of intended recipients is controlled by a Filter (or by the trigger in an Event-triggered Campaign). The platform supports several items that allow you to modify this audience, by either adding or removing selected individuals.
Create a seed list (email as unique identifier)
A Seed List is a group of one or more individuals who are designated to receive a copy of a Campaign message. When the Campaign is launched, the system will automatically send the Campaign message to each recipient in the Seed List, regardless of whether those individuals match the Filter criteria used to define the main Campaign audience.
Note: Seed Lists can be built either by manually defining the Seed List recipients (described below), or by using a Filter to select the Seed List recipients based on logical criteria. For more details on Filters, please see the How to Create a Filter Quick Card.
1. In the Top Navigation bar, select Assets > Execution > Seed Lists.
2. To the right of the search by name field, click the New button.
3. Fill out the details for the Seed List:
- Name: Enter a unique descriptive name for the Seed List.
- Data Source: Select the source table for the Seed List.
4 Click Create.
Hint: By default, the platform adds you as a member of the Seed List.
5. Enter the Seed List recipient's email address in the Add New List Member field.
6. Click the add button.
7. Repeat the above steps as needed to add more recipients to the Seed List.
8. On the Tool Ribbon, click Save.
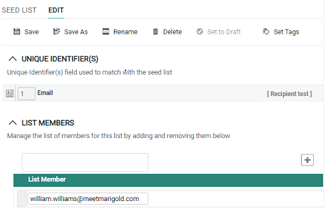
Create a seed list (other field as unique identifier)
If the Unique Identifier in the Seed List's source table is anything OTHER than an email address, the system imposes an important restriction: the individuals in your Seed List must exist in the source table, and the records for those individuals must have an email address to send them the Seed List message.
Hint: For informational purposes, the Unique Identifier for the Seed List's source table is displayed on the screen, above the Seed List recipients.
1. In the Top Navigation bar, select Assets > Execution > Seed Lists.
2. To the right of the search by name field, click the New button.
3. Fill out the details for the Seed List:
- Name: Enter a unique descriptive name for the Seed List.
- Data Source: Select the source table for the Seed List.
4. Click Create.
5. In the Add New List Member field, enter the Unique Identifier value.
6. Click the add button.
7. Repeat the above steps as needed to add more recipients to the Seed List.
8. On the Tool Ribbon, click Save.
Create an exclusion list
An Exclusion List consists of individuals who should not be included in your Campaign, such as email addresses from competitors, for example. If a specific individual appears within an Exclusion List, and that same person meets the Filter criteria used to define the Campaign audience, that person would not receive the Campaign message.
Note: Exclusion Lists must be created using an import file with only one column of data containing the desired email addresses.
1. In the Top Navigation bar, select Assets > Execution > Exclusion Lists.
2. To the right of the search by name field, click the New button.
3. Fill out the details for the Exclusion List:
- Name: Enter a unique descriptive name for the Exclusion List.
- Type: Select "Standard."
Note: The other type of Exclusion List, "Virtual," is used exclusively for Load and Send Campaigns, and isn't described in this Quick Card.
4. Click Create.
5. From the Data Type drop-down menu, select Email Address.
6. Click Choose File.
7. Browse to and select the Exclusion List import file.
8. If the import file has a header row, check the File has a header row? checkbox.
9. Select Append Records in File to List.
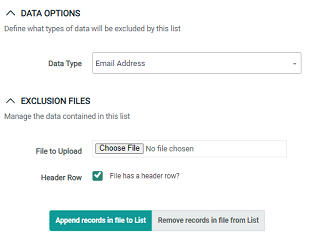
10. On the Tool Ribbon, click Save. The platform begins the import process.
11. When the import is complete, the system displays the final information about the import, including the number of records added, and the date / time.
Edit an exclusion list
The platform allows you to modify an existing Exclusion List by either adding new individuals to the List, or by removing existing individuals from the List.
1. Navigate to the Exclusion List.
2. Browse to and select the import file.
3. Select either:
- Append records in file to List: Add the individuals in the import file to this Exclusion List
- Remove records in file from List: Remove the individuals in the import file from the Exclusion List
4. On the Tool Ribbon, click Save.
Assign a seed list to a campaign
To add a Seed List to a Campaign:
1. Navigate to the Campaign.
2. Click the Setup tab.
3. Within the Audience section, from the Advanced Options drop-down menu, select Add Seed List.
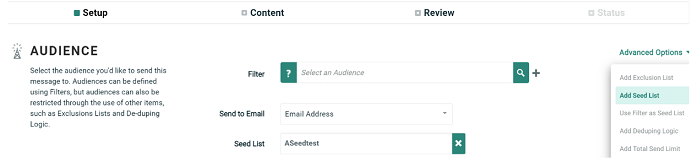
4. In the pop-up window, browse to and select the desired Seed List.
5. The Seed List is added to the Campaign screen, within the Audience section.
Assign an exclusion list to a campaign
To add an Exclusion List to a Campaign:
1. Navigate to the Campaign.
2. Click the Setup chevron.
3. Within the Audience section, from the Advanced Options drop-down menu, select Add Exclusion List.
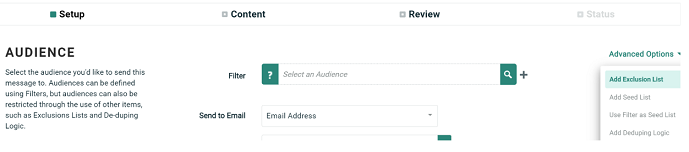
4. In the pop-up window, browse to and select the desired Exclusion List.
5. The Exclusion List is added to the Campaign screen, within the Audience section.
